
In CPA marketing, the bridge page is the single most important piece of the puzzle you control. It’s the critical link between your traffic and the advertiser’s offer, and creating a good one can skyrocket your conversion rates.
Many beginners skip this step and link directly to the offer, which is a huge mistake. It’s less effective and often forbidden by CPA networks.
This guide will show you the exact anatomy of a high-converting bridge page and walk you step-by-step through creating one for free using a tool like Systeme.io.
The Anatomy of a Perfect Bridge Page
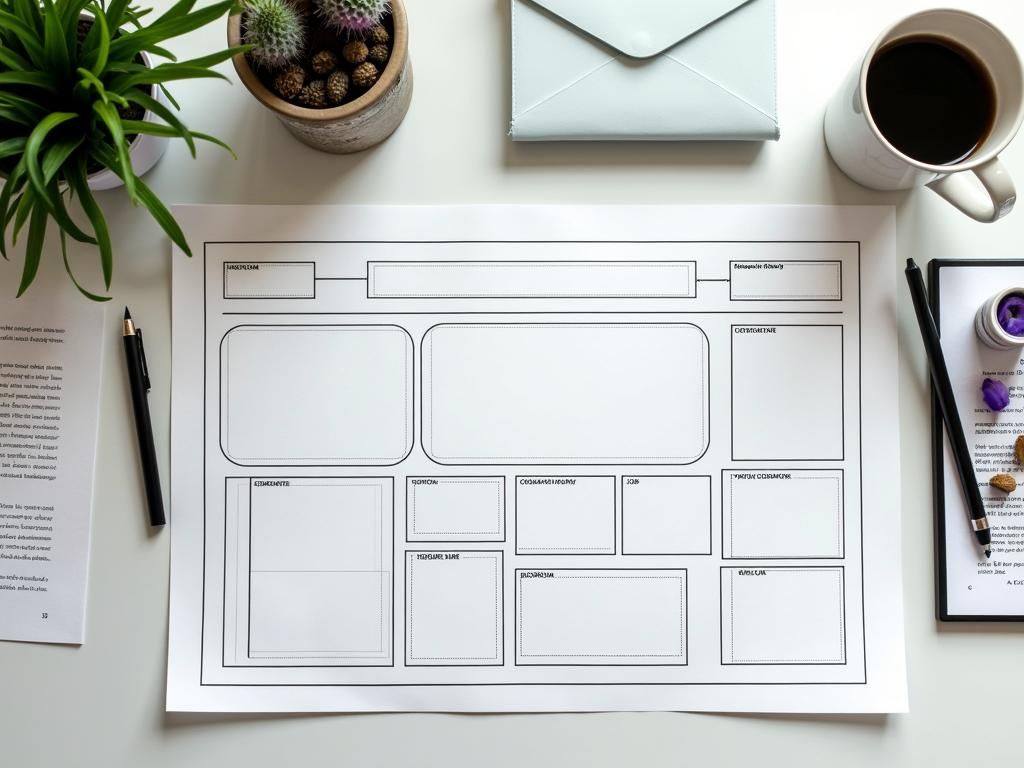
Before we build, let’s look at the blueprint. A simple but effective bridge page only needs four key elements.
The Compelling Headline: This is 80% of the work. It must grab attention and connect with the promise made in your ad or content.
- The Supporting Visual: An image or short video that reinforces the headline and shows the benefit of the offer.
- The Benefit-Driven Body: A few short sentences or bullet points. Don’t list features; list what the user gets (e.g., “Save time,” “Get a free sample,” “Find out your score”).
- The Unmistakable Call-to-Action (CTA): A big, bold button with clear, action-oriented text (e.g., “Get My Free Quote,” “Download Now”). This is where you will place your CPA affiliate link.
Building Your Bridge Page: A Step-by-Step Tutorial
Step 1: Choose Your Tool
You don’t need expensive software. Start with a powerful free tool.
For this tutorial, we’ll use Systeme.io because its free plan is perfect for building entire funnels. Sign up for a free account.
Step 2: Create a New Funnel
In your Systeme.io dashboard, click “Funnels” -> “Create.” Give it a name (e.g., “Car Insurance Offer”) and choose “Build an audience.”
Step 3: Select a Template and Craft Your Content
Systeme.io will give you a “Squeeze Page” (your bridge page) and a “Thank You Page.” Ignore the Thank You Page for now. Choose a simple, clean template for the Squeeze Page.
Now, edit the template with your content based on the anatomy above:
- Change the Headline: Double-click the text and write your compelling headline.
- Change the Image: Select the default image and replace it with one that’s relevant to your offer.
- Edit the Body/Bullets: Rewrite the bullet points to highlight the top 2-3 benefits of your CPA offer.
- Delete Unnecessary Elements: Your bridge page should be simple. Delete any sections you don’t need (like footers, navigation bars, etc.).
Step 4: Configure Your Call-to-Action (CTA) Button
This is the most important technical step.
- Click on the main button on your page.
- On the left-hand menu, find the “Action when button clicked” setting.
- Select “Redirect to a custom URL.”
- In the “URL” box below, paste your unique CPA affiliate link.
- Change the button text to something compelling, like “Show Me My Quote!”
Step 5: Save and Publish
Click “Save Changes” in the top right. Go back to the funnel steps, and you’ll see the URL for your new bridge page. Copy it, and that’s the link you will use in all your ads and content!
And that’s it. In under 30 minutes, you’ve created a professional, high-converting bridge page that puts you leagues ahead of other beginners.


95r7ph
Woh I like your content, saved to bookmarks! .
тренды свадебных платьев свадебные платья москва каталог
Нужны столбики? мобильный столбик столбики для складов, парковок и общественных пространств. Прочные материалы, устойчивое основание и удобство перемещения обеспечивают безопасность и порядок.
провод электрический купить проводка купить
Looking for a yacht? Cyprus yacht booking platform for unforgettable sea adventures. Charter luxury yachts, catamarans, or motorboats with or without crew. Explore crystal-clear waters, secluded bays, and iconic coastal locations in first-class comfort onboard.
грузчик москва ежедневные сколько стоят услуги грузчиков
услуги грузчиков недорого услуги грузчиков расценки
газоблок цена купить газобетон в краснодаре
Google Salaries https://salarydatahub.uk by Role (US & UK) – Real Pay Ranges, Levels, and Total Compensation
приварной кран шаровые краны под приварку
All the best stuff is here: check out here
Looking for a yacht? VIP yacht services in Cyprus for unforgettable sea adventures. Charter luxury yachts, catamarans, or motorboats with or without crew. Explore crystal-clear waters, secluded bays, and iconic coastal locations in first-class comfort onboard.
мобильные стойки ограждения купить столбики ограждения с цепью
магазин где купить кабель провод купить в минске
свадебные платья 2026 москва каталог свадебных платьев 2026
Looking for a casino? https://pinupturkiye.org is a licensed online casino with a wide selection of slots, live dealer games, and sports betting. New players can take advantage of a welcome bonus and regular promotions; deposits and withdrawals are available through popular methods. The site supports responsible gaming and offers customer support in multiple languages. Pinup Casino is suitable for players who prefer a user-friendly interface and a wide range of entertainment options.
сайт послугами ремонту квартир ремонт квартир
Онлайн-журнал https://tga-info.ru со статьями обо всём: от технологий и финансов до психологии, бизнеса и лайфхаков. Читайте полезные материалы, обзоры, аналитические статьи и практические рекомендации для работы, обучения и повседневной жизни.
Строительный портал https://nesmetnoe.ru с полезными статьями о строительстве домов, ремонте квартир, выборе материалов и современных технологиях. Советы специалистов, инструкции, обзоры инструментов, идеи для интерьера и практические решения для частного и коммерческого строительства.
Онлайн-блог https://lifeoflove.ru о семейной жизни, психологии любви и гармоничных отношениях. Читайте статьи о доверии, понимании, воспитании детей, романтике и совместном досуге. Полезные советы и вдохновение для счастливой семейной жизни.
Интернет-журнал https://greendachnik.ru о садоводстве, огороде и ландшафтном дизайне. Полезные статьи о выращивании овощей, фруктов и цветов, уходе за растениями, планировании участка и создании красивого сада. Советы садоводов, идеи оформления и практические рекомендации.
Новости IT https://hardexpert.net и компьютерного мира: новинки технологий, программное обеспечение, гаджеты, компьютерные комплектующие и цифровые сервисы. Обзоры, аналитика, обновления программ и последние события в мире технологий.
Автомобильный портал https://hyundai-sto.ru со статьями обо всем, что связано с машинами. Новости автопрома, обзоры автомобилей, советы по выбору, ремонту и обслуживанию, сравнения моделей, технологии и полезная информация для водителей и автолюбителей.
Женский сайт https://allsekrets.ru о красоте, моде, здоровье и отношениях. Полезные статьи о стиле, уходе за собой, психологии, семейной жизни и саморазвитии. Советы, идеи и вдохновение для современной женщины, которая хочет выглядеть красиво и чувствовать гармонию.
Женский портал https://idealnaya-ya.ru о красоте, моде, здоровье и гармоничной жизни. Читайте статьи о стиле, отношениях, психологии, воспитании детей, саморазвитии и уходе за собой. Полезные советы, вдохновение и идеи для счастливой жизни.
Все о стройке https://dobdom.ru и ремонте: полезные статьи о строительстве домов, ремонте квартир, отделке помещений и выборе материалов. Советы специалистов, инструкции, идеи для интерьера и практические рекомендации по строительству и благоустройству жилья.
Портал о стройке https://profsmeta3dn.ru и ремонте: строительство домов, ремонт квартир, отделка помещений и современные строительные технологии. Полезные советы мастеров, обзоры материалов и инструмента, инструкции и идеи для ремонта и благоустройства жилья.
Found a bride? unique proposal ideas in Barcelona romantic scenarios, beautiful locations, photo shoots, decor, and surprises for the perfect declaration of love. Make your engagement in Barcelona an unforgettable moment in your story.
Проблемы с застройщиком? неустойка дду юрист помощь юриста по долевому строительству, расчет неустойки, подготовка претензии и подача иска в суд. Защитим права дольщиков и поможем получить компенсацию.
Нужен юрист? арбитражный юрист москва представительство в арбитражном суде, защита интересов бизнеса, взыскание задолженности, споры по договорам и сопровождение судебных процессов для компаний и предпринимателей.
Ищешь кран? шаровые краны под приварку для трубопроводов различного назначения. Надежная запорная арматура для систем водоснабжения, отопления, газа и промышленных магистралей. Высокая герметичность, долговечность и устойчивость к нагрузкам.
парфюмерия духи магазин https://elicebeauty.com/parfyumeriya/filter/_m94_m196/
Сертификация товаров http://center-sertifikaciya.ru это важный этап для подтверждения качества и безопасности продукции, который позволяет производителям и поставщикам выходить на рынок с уверенностью в соответствии нормам. Процесс получения сертификата включает несколько ключевых шагов, начиная от подготовки документов и заканчивая выдачей официального документа. Это не только обязательное требование для многих видов товаров, но и способ повысить доверие потребителей. В этой статье мы разберем основные этапы сертификации, чтобы вы могли лучше понять, как получить сертификат на товар и избежать распространенных ошибок.
Прокат авто посуточно Сочи https://avto-arenda-sochi.ru
монро казино сайт https://modernizatsya.ru
SEO-продвижение https://outreachseo.ru сайта для роста посещаемости и увеличения продаж. Проводим аудит, оптимизацию структуры, работу с контентом и техническими параметрами сайта, чтобы улучшить позиции в поисковых системах и привлечь целевой трафик.
Профессиональное SEO-продвижение https://outreachseo.ru сайтов для бизнеса. Анализ конкурентов, оптимизация структуры и контента, улучшение технических параметров и развитие сайта для роста позиций в поисковых системах и увеличения целевого трафика.
Explore detailed insights on staff time clocks for main room at TopXClocks, including features, comparisons, and expert recommendations for smarter buying decisions.
кольцо женское цена 585 кольцо для помолвки девушке
Current https://www.the-weather-in-podgorica.com, today and in the coming days. Accurate forecast of temperature, precipitation, wind, and humidity. Find out what the weather is like in Podgorica now, the weekly forecast for the month, and weather trends in Montenegro’s capital.
Если вам нравится стиль провайдера Hacksaw Gaming – резкие бонуски, высокая динамика и слоты, которые часто держат в напряжении до последнего спина – загляните в наш Telegram. Мы ведём канал именно про Hacksaw: публикуем подборки лучших тайтлов, разбираем фичи (покупка бонуса, модификаторы, этапы бонус-раундов), отмечаем, какие игры больше “на разнос”, а какие спокойнее по темпу, и делимся новинками, как только они появляются. Удобно, если хотите быть в теме и быстро выбирать, во что сыграть сегодня.
Если вы подбираете лучшие казино на рубли, смотрите шире, чем просто наличие RUB в кассе. Важно, чтобы рублёвые операции были реально удобными: без лишних шагов, с адекватными лимитами и понятными правилами по выводу (часто встречается требование выводить тем же методом, что пополняли). Мы публикуем свежие подборки и обновления по таким площадкам в Telegram – там проще сравнить варианты и выбрать подходящий. https://t.me/s/rating_casino_russia/25
Explore detailed insights on https://topxclocks.com/big-digital-led-calendar-wall-clocks/ big digital led calendar wall clocks at TopXClocks, including features, comparisons, and expert recommendations for smarter buying decisions.
Информационный портал https://tga-info.ru/ со статьями и обзорами на разные темы. Материалы о технологиях жизни работе доме и повседневных вопросах. Актуальные новости полезные советы рекомендации и интересная информация для читателей.
Интернет ресурс https://www.nesmetnoe.ru с полезными статьями советами и обзорами. Материалы о жизни здоровье технологиях доме и повседневных вопросах. Практические рекомендации интересные факты и актуальная информация для широкой аудитории.
Статьи о любви https://lifeoflove.ru/ отношениях, психологии и семейной жизни. Советы по гармоничным отношениям общению и саморазвитию. Полезные рекомендации вдохновляющие истории и материалы для тех кто хочет улучшить личную жизнь.
Полезные материалы https://www.greendachnik.ru для дачников и садоводов. Советы по выращиванию овощей цветов и плодовых растений уходу за садом огородом и участком. Практические рекомендации идеи для дачи и комфортной загородной жизни.
Материалы о компьютерах https://hardexpert.net технологиях электронике и IT. Обзоры техники советы по выбору комплектующих настройке программ и использованию устройств. Полезная информация для пользователей и любителей технологий.
Сборник полезных советов http://www.allsekrets.ru и лайфхаков на каждый день. Материалы о доме здоровье красоте и повседневной жизни. Интересные статьи практические рекомендации и идеи которые помогут упростить бытовые задачи.
Информация о ремонте http://www.hyundai-sto.ru/ обслуживании и диагностике автомобилей Hyundai. Советы по техническому обслуживанию выбору запчастей и эксплуатации автомобиля. Полезные материалы для владельцев и автолюбителей.
Материалы о красоте idealnaya-ya.ru здоровье саморазвитии и уходе за собой. Советы по питанию фитнесу психологии и гармоничной жизни. Полезные статьи рекомендации и идеи для улучшения самочувствия и образа жизни.
Интересуют новости? актуальные новости главные новости дня на одном портале. Свежие события из политики, экономики, общества, технологий и культуры. Оперативная информация, аналитика, комментарии экспертов и важные факты, которые помогают понимать происходящее.
Лучшие сервера рейтинг дешевых vps в россии сравнение dedicated servers по цене, производительности и надежности. Рейтинг хостингов, которые предлагают мощные серверные решения.
Найти лучший сервер виртуальный хостинг рейтинг dedicated servers от популярных хостинг-провайдеров. Сравните выделенные серверы по характеристикам, стоимости и возможностям масштабирования для бизнеса и веб-проектов.
Нужен сервер? vps для vpn dedicated servers с мощными процессорами, NVMe SSD и высокой стабильностью. Подберите оптимальный сервер для бизнеса, разработки и высоких нагрузок.
Ищешь сервер? VPS/VDS-хостинг сравнение dedicated server хостинга по характеристикам, цене, производительности и uptime. Лучшие провайдеры для размещения сайтов, интернет-магазинов и крупных проектов.
Рейтинги серверов хостинг-провайдеры актуальный рейтинг dedicated server хостинга с сравнением характеристик, стоимости и производительности. Найдите оптимальный сервер для бизнеса, интернет-магазина, SaaS-сервисов и крупных сайтов.
Обзор и рейтинги серверов рейтинг сервисов для vps в россии сравните выделенные серверы по характеристикам, цене, процессорам и дискам SSD. Выберите надежный сервер для размещения сайтов, приложений и высоких нагрузок.
Проблемы с алкоголем? нарколог наркологическая помощь медицинская помощь при алкогольной зависимости, детоксикация организма и восстановление самочувствия. Консультации специалистов и безопасное лечение.
Гарантированное лечение врач нарколог специалист приезжает к пациенту, проводит детоксикацию организма, помогает снять симптомы алкогольной интоксикации и контролирует состояние. Безопасный и конфиденциальный подход.
Профессиональный запой стационар детоксикация организма, помощь при алкогольной интоксикации и восстановление самочувствия пациента. Специалист приезжает на дом и оказывает профессиональную помощь.
Профессиональный вывод из запоя вызов детоксикация организма, помощь при алкогольной интоксикации и восстановление самочувствия пациента. Специалист приезжает на дом и оказывает профессиональную помощь.
Goooto: https://goooto.ru Информационный портал о женском и мужском здоровье. Статьи об ЭКО, методах диагностики, лечении гинекологических заболеваний и планировании беременности.
Добровольная сертификация http://сертификация-соответствия.рф товаров, в отличие от обязательной, не является принудительной, но предоставляет значительные преимущества для бизнеса. Производители могут добровольно сертифицировать свою продукцию по стандартам ISO, ГОСТ Р или другим системам, чтобы повысить конкурентоспособность. Среди ключевых преимуществ — укрепление репутации бренда, расширение рынков сбыта, включая экспорт, и привлечение лояльных клиентов, которые предпочитают сертифицированные товары. Например, добровольная сертификация на экологичность может стать преимуществом в глазах потребителей, ориентированных на устойчивость. В итоге, такая сертификация не только повышает доверие, но и способствует росту продаж и улучшению качества продукции.
Круглосуточный вывод из запоя специалист проводит детоксикацию организма, помогает снять симптомы алкогольной интоксикации и контролирует состояние пациента. Медицинская помощь оказывается конфиденциально и направлена на быстрое восстановление самочувствия.
Гарантированный безопасный капельница запой вывод из запоя с наблюдением, детоксикацией организма и поддержкой врача. Процедуры направлены на восстановление состояния пациента и улучшение самочувствия.
Необходимые документы http://tehnicheskie-reglamenti.ru для процесса получения сертификата включают техническую документацию на товар, такую как паспорт изделия, инструкции по эксплуатации и результаты внутренних тестов. Также потребуются учредительные документы компании, контракты с поставщиками и, в некоторых случаях, протоколы испытаний от независимых лабораторий. Рекомендуется заранее проконсультироваться с экспертами, чтобы собрать полный пакет и ускорить процедуру. Это особенно важно для импортеров, так как несоответствие может привести к задержкам на таможне.
Основные этапы сертификации http://sertifikati-sootvetstviya.ru товаров начинаются с анализа требований. Сначала необходимо определить тип сертификата — добровольный или обязательный — в зависимости от категории продукции, такой как электроника, пищевые продукты или строительные материалы. Далее следует сбор и подача документов в аккредитованный орган по сертификации. После этого проводится лабораторное тестирование образцов, где проверяется соответствие стандартам ГОСТ или международным нормам. Завершающим этапом является аудит производства и выдача сертификата, если все требования соблюдены.
Важность сертификации http://sertifikaciya-rf.ru для бизнеса невозможно переоценить, поскольку она открывает двери для расширения рынков и повышения конкурентоспособности. Компании, прошедшие сертификацию, получают преимущество в тендерах, экспорте и партнерствах, так как их продукция воспринимается как более надежная. Кроме того, сертификат помогает минимизировать юридические риски, связанные с претензиями потребителей или регуляторными штрафами. Для бизнеса сертификация — это инвестиция в репутацию и долгосрочный рост, позволяющая выделиться среди конкурентов и завоевать доверие клиентов.
Обязательная сертификация http://organ-sertifikacii.ru товаров предусмотрена законодательством и является необходимым требованием для определенных категорий продукции. Согласно нормам Таможенного союза ЕАЭС и российскому законодательству, такие товары, как электроника, детские изделия, пищевая продукция и медицинские приборы, должны проходить обязательную проверку на соответствие техническим регламентам. Это обеспечивает безопасность для здоровья и жизни потребителей, предотвращая попадание на рынок некачественной или опасной продукции. Процесс включает лабораторные испытания, аудит производства и выдачу сертификата соответствия. Без такой сертификации реализация товаров может быть запрещена, что подчеркивает ее роль в соблюдении правовых норм и защите рынка.
Наш магазин https://atmosfera-market.ru является официальным дилером климатической техники. В каталоге магазина большой выбор проверенных марок и моделей кондиционеров, которые можно Купить с доставкой и установкой в Москве, Цена зависит от параметров, которые приводятся в карточках товаров. У нас можно не только купить климатические системы. Мы занимаемся также установкой, а качественный монтаж это очень важно для данного оборудования. Предоставляем гарантию на всю технику и работы.
заказать пицу пицца куба ул чапаева
ТОП площадка https://spark.ru/user/267982/blog/309941/ggdrop-ndash-luchshij-sajt-dlya-otkritiya-kejsov-cs2-i-viigrisha-skinov для кейсов CS2 с большим выбором кейсов, честными шансами и быстрым выводом скинов. Открывайте кейсы Counter-Strike 2, получайте редкие предметы и участвуйте в розыгрышах. Удобный интерфейс, бонусы для новых игроков и регулярные обновления.
Подробности на странице: Эффективное лечение в урологии: как записаться на прием к специалисту
Качественное SEO https://outreachseo.ru продвижение сайта для бизнеса. Наши специалисты предлагают эффективные решения для роста позиций в поисковых системах. Подробнее об услугах и стратегиях можно узнать на сайте
Reliable source buy aged facebook profiles for running ads connects advertisers with thoroughly vetted profiles backed by replacement guarantees and dedicated support. The platform combines speed and reliability — most products are delivered automatically within minutes after payment confirmation. Experienced buyers return for the consistency — same quality standards, same fast delivery, same professional support every time.
Wholesale supplier buy facebook ad accounts Germany enables teams to source diverse account portfolios across platforms and geos from a single centralized marketplace. Orders are processed through a secure checkout system with multiple payment options and encrypted credential delivery via personal dashboard. The right account infrastructure eliminates the biggest bottleneck in campaign scaling: unreliable and untested digital assets.
Specialized store tiktok organic growth accounts focuses exclusively on accounts proven to perform in paid advertising with real spend history and trust indicators. Every account goes through rigorous testing for login stability, platform trust signals, and checkpoint clearance before being listed in the catalog. Scale your advertising operations on a foundation of quality — verified profiles, complete credentials, and expert operational support.
Professional service check this specializes in accounts optimized for paid campaigns with proper warming history and platform trust markers. The marketplace serves a global buyer base with English-speaking support available via Telegram for product selection and order management. From first purchase to ongoing scaling, the platform supports every stage of a media buyer’s operational journey.
Experienced supplier reliable yahoo mail for registrations online offers complete asset packages including login credentials, recovery access, 2FA codes, cookies, and user-agent data. Step-by-step documentation accompanies every order, covering login procedure, security setup, and recommended first actions after access. Experienced buyers return for the consistency — same quality standards, same fast delivery, same professional support every time.
Modern platform this resource caters to solo buyers and agencies who need reliable accounts at scale with volume pricing and priority restocking. A loyalty program with cashback on every order makes repeated purchases more cost-effective for teams with regular sourcing requirements. Marketplace standards ensure that every account performs as described — no surprises at checkout, login, or campaign launch.
Premium marketplace gmail accounts marketplace features an extensive inventory updated daily across all major geos including USA, Europe, and Asia-Pacific regions. The team provides onboarding guidance for new buyers and ongoing operational support for teams managing high-volume campaign portfolios. Experienced buyers return for the consistency — same quality standards, same fast delivery, same professional support every time.
Wholesale supplier google ads accounts shop enables teams to source diverse account portfolios across platforms and geos from a single centralized marketplace. The knowledge base includes working guides for account warming, ad launch protocols, and reinstatement check procedures for reference. Invest in verified account infrastructure and redirect the time saved from troubleshooting into actual campaign optimization work.
Full-service dealer buy warmed up facebook profiles with email goes beyond selling by providing operational guides, restriction breakdowns, and platform update summaries. Every account goes through rigorous testing for login stability, platform trust signals, and checkpoint clearance before being listed in the catalog. Experienced buyers return for the consistency — same quality standards, same fast delivery, same professional support every time.
Жіночий онлайн https://soloha.in.ua портал з корисними статтями про моду, красу, здоров’я та стосунки. Поради щодо догляду за собою, психології, сім’ї та кар’єри. Актуальні тренди, лайфхаки та натхнення для сучасних жінок.
Інформаційний портал https://pensioneram.in.ua для пенсіонерів України Корисні поради про пенсії, соціальні виплати, пільги, здоров’я та повсякденне життя. Актуальні новини, рекомендації фахівців та прості пояснення важливих змін законодавства.
Пояснюємо складні теми https://notatky.net.ua простими словами. Публікуємо зрозумілі статті про технології, фінанси, науку, закони та інші важливі питання. Читайте розбірки та корисні пояснення.
Quality-focused marketplace best verified facebook BM for long-term campaigns runs multi-step verification on every listing before it reaches the catalog to protect buyer interests. The catalog is segmented by platform, geo, account type, and price tier to simplify navigation for both new and returning customers. Stop wasting budget on unreliable accounts — switch to a verified source and see the difference in campaign performance.
Сайт про народні прикмети https://zefirka.net.ua тлумачення снів та значення імен. Дізнайтеся, що означають сни, як трактуються прикмети та які традиції пов’язані зі святами різних народів.
Сайт міста Дніпро https://faine-misto.dp.ua з актуальними новинами, подіями та корисною інформацією для мешканців та гостей. Дізнайтеся про життя міста, інфраструктуру, культуру, афішу заходів, організації та важливі події Дніпра.
Сайт міста Хмельницький https://faine-misto.km.ua з актуальними новинами, подіями та корисною інформацією для мешканців та гостей. Дізнайтеся про міське життя, інфраструктуру, культуру, заходи, організації та важливі події міста.
Жіночий сайт https://u-kumy.com про красу, здоров’я, моду, відносини і стиль життя. Корисні поради, статті, ідеї для натхнення та рекомендації для сучасних жінок. Читайте про саморозвиток, сім’ю, догляд за собою та актуальні тренди.
Чоловічий блог https://u-kuma.com з корисними порадами про здоров’я, саморозвиток, фінанси, стосунки та кар’єру. Публікуємо цікаві статті, лайфхаки та рекомендації для чоловіків, які хочуть покращити своє життя.
Sports betting at Mostbet mostbet.edu.pl. The platform offers a wide range of events, high odds, bonuses, and a user-friendly mobile app. Place bets on football, hockey, tennis, and other sports.
Mostbet bookmaker https://mostbet.biz.pl/ offers betting on sports, esports, and online games. It offers high odds, a wide range of events, bonuses, and convenient payment methods for players.
Almastriga: Relics of Azathoth http://www.almastriga.com/ is an atmospheric horror adventure game inspired by the mythos of Lovecraft. Explore eerie locations, uncover ancient secrets, and find relics of Azathoth in a world full of mysteries and dangers.
Lust Theory Seasons lust theory 1, 2, and 3 are a popular visual novel with a captivating plot, action choices, and a diverse cast of characters. Follow the story as it unfolds, make decisions, and unlock new storylines.
Dive into Lust Academy http://www.lustacademy.org/ and explore all seasons of this popular visual novel. Learn about the characters, story, and interactive storytelling possibilities.
My Cute Roommate http://www.my-cute-roommate.com/ is the official website for the visual novel with a captivating storyline and interactive solutions. Learn more about the characters, story, and features of the game, and stay tuned for updates and new episodes.
Perfect Date official https://perfect-date.org website offers detailed information about the characters, plot, and gameplay features. Read the news and stay up-to-date on the latest updates.
Operation Lovecraft http://www.operation-lovecraft.org Official Game Guide for players who want to learn more about the plot, missions, and characters. Helpful tips, hints, and detailed guides will help you complete the game and unlock all storylines.
Бесплатная консультация юриста — это возможность получить профессиональную правовую помощь без оплаты. Перейдя по запросу цена на услуги городского адвоката вы получите поддержку специалиста, который выслушает вашу ситуацию, оценит риски и подскажет возможные варианты решения: от подготовки документов до защиты интересов в суде. Такая консультация помогает понять свои права, избежать ошибок и выбрать правильную стратегию действий.
Download Subverse http://www.sub-verse.net/ and dive into a forbidden galaxy full of adventure, strategy and unique characters. Explore new worlds, command your crew and experience an epic sci-fi journey in this action-packed space game.
Treasure of Nadia treasure-of-nadia.org Official Game Site with detailed information about the adventure game. Read news, learn about the characters, and learn about the gameplay features.
Женский портал https://7krasotok.com о красоте, здоровье, моде и отношениях. Полезные советы, статьи о семье, психологии и саморазвитии. Читайте рекомендации экспертов, узнавайте о трендах и находите вдохновение для гармоничной жизни.
Женский онлайн https://krasotka-fl.com.ua портал с полезными материалами о красоте, здоровье, моде и отношениях. Советы по уходу за собой, психологии и саморазвитию для современной женщины.
Нужен банный веник? купить пихтовый веник натуральные банные веники помогают улучшить эффект парения и создать особую атмосферу в бане. У нас можно купить веник для бани из березы, дуба или эвкалипта.
Нужен банный веник? веники для бани натуральные банные веники помогают улучшить эффект парения и создать особую атмосферу в бане. У нас можно купить веник для бани из березы, дуба или эвкалипта.
Противопожарные двери https://zavod-dverimontazh.moscow от производителя с профессиональной установкой в Москве. Изготовление по ГОСТ, сертифицированные конструкции с высокой огнестойкостью. Металлические противопожарные двери для офисов, складов, жилых и коммерческих зданий. Доставка, монтаж, гарантия качества и выгодные цены.
Любишь азарт? https://pfrrt.ru предлагает разнообразные игровые автоматы, настольные игры и интересные бонусные программы. Платформа создана для комфортной игры и предлагает широкий выбор развлечений.
Любишь азарт? https://school57.ru предлагает разнообразные игровые автоматы, настольные игры и интересные бонусные программы. Платформа создана для комфортной игры и предлагает широкий выбор развлечений.
Все о строительстве https://dipris-studio.ru и дизайне загородного дома: современные проекты, идеи планировки, выбор материалов, этапы строительства и оформление интерьера. Полезные советы по строительству коттеджей, ремонту и благоустройству участка. Практические рекомендации для владельцев домов и тех, кто только планирует строительство.
Новостной портал https://newsn.ru — свежие новости России и мира, политика, экономика, общество, технологии и культура. Оперативные публикации, аналитические материалы и главные события дня. Узнавайте важные новости первыми и следите за развитием событий онлайн.
Все о строительстве https://sportdon.ru и ремонтах: рекомендации по выбору материалов, технологиям строительства, отделке помещений и дизайну интерьера. Полезные статьи для тех, кто строит дом, делает ремонт квартиры или планирует обновление интерьера.
Портал новостей https://hand-store.ru о высоких технологиях и IT-индустрии. Последние события в мире программирования, искусственного интеллекта, стартапов, гаджетов и цифровых технологий. Читайте обзоры, аналитические материалы и важные новости технологического рынка.
Портал про здоровье https://vekneboley.ru с полезными статьями о профилактике заболеваний, правильном питании, иммунитете и здоровом образе жизни. Рекомендации специалистов, советы по поддержанию здоровья, физической активности и улучшению самочувствия каждый день.
Портал о бытовой https://expert-byt.ru технике и ее эксплуатации. Полезные статьи о выборе техники для дома, правильном использовании, уходе и продлении срока службы устройств. Советы по ремонту, обслуживанию и эффективному использованию бытовой техники в повседневной жизни.
Читайте свежие новости https://иваново37.рф России на новостном портале. Главные события дня, политика, экономика, общество, технологии и культура. Оперативные публикации, аналитика и важная информация о событиях в стране и мире.
Все о смартфонах https://topse.ru мобильных телефонах и гаджетах Sony. Новости, обзоры новых моделей Xperia, характеристики устройств, сравнение смартфонов и полезные советы по выбору техники. Узнайте о новинках Sony, технологиях камер, производительности и возможностях мобильных устройств.
Свежие мировые https://novostizn.ru новости и интересные события со всех уголков планеты. Политика, экономика, технологии, культура, наука и общественная жизнь. Актуальные новости, аналитика и необычные факты о событиях, которые обсуждает весь мир.
Мировые новости https://dikb.ru и интересные события каждый день. Самые важные события политики, экономики, технологий, науки и культуры. Свежие публикации, аналитика и необычные факты о происходящем в разных странах мира.
Консультация семейного юриста поможет быстро разобраться в сложных жизненных ситуациях: развод, раздел имущества, алименты, споры о детях и брачные договоры. Перейдя по запросу юрист по семейным правоотношениям – специалист объяснит ваши права, оценит перспективы дела и предложит оптимальный план действий. Получите профессиональную юридическую помощь и ответы на все вопросы по семейному праву.
Live streams selcuksport.com.az of football matches and sports TV shows online. Football news, schedules, results, and analysis. Follow your favorite teams, watch highlights, and stay up-to-date on the latest news from the world of football.
Противопожарные двери https://zavod-dverimontazh.moscow в Москве от производителя. Надежные металлические двери с высокой огнестойкостью для жилых и коммерческих помещений. Сертификация, соответствие нормам пожарной безопасности, быстрая доставка и установка противопожарных дверей под ключ.
Playmods APK playmods.com.az is a convenient app for downloading modified games and apps on Android. It offers a large catalog of popular games, fast mod updates, additional features, and a simple interface for easy searching and installation.
Текущие рекомендации: https://slovarsbor.ru/w/%d1%88%d0%b0%d1%80%d0%b0%d0%bd/
Общаешься в максе? топ каналов max удобный способ найти интересные каналы в мессенджере. Новости, технологии, бизнес, развлечения и другие категории. Просматривайте популярные каналы, открывайте новые источники информации и подписывайтесь.
Строительный портал https://apis-togo.org с полезными статьями о строительстве домов, ремонте квартир и выборе строительных материалов. Советы специалистов, современные технологии строительства, идеи дизайна интерьера и практические рекомендации для ремонта и обустройства жилья.
Строительный журнал https://eeu-a.kiev.ua о строительстве, ремонте и дизайне. Полезные статьи о строительных технологиях, выборе материалов, отделке помещений и обустройстве дома. Практические советы для тех, кто строит дом или делает ремонт.
Строительный портал https://furbero.com с полезной информацией о строительстве домов, ремонте квартир и отделке помещений. Советы по выбору материалов, современные технологии строительства и идеи дизайна интерьера для комфортного жилья.
Все о строительстве https://elektrod.com.ua и ремонте на строительном портале. Советы по выбору строительных материалов, технологиям строительства, отделке помещений и дизайну интерьера. Полезные рекомендации для владельцев домов, квартир и загородной недвижимости.
Полезные статьи https://novostroi.in.ua о строительстве и ремонте на строительном портале. Технологии строительства, выбор материалов, отделка помещений и дизайн интерьера. Практические рекомендации для строительства дома и ремонта квартиры.
Портал про автомобили https://carexpert.com.ua новости автоиндустрии, обзоры новых моделей, тест-драйвы и советы по эксплуатации машин. Полезные статьи для автолюбителей о выборе автомобиля, ремонте, обслуживании и современных автомобильных технологиях.
Автомобильный портал https://autoiceny.com.ua для автолюбителей. Свежие новости автоиндустрии, обзоры автомобилей, тест-драйвы, рекомендации по эксплуатации и обслуживанию машин. Полезная информация о современных автомобилях и автомобильных технологиях.
Все об автомобилях https://eurasiamobilechallenge.com на автомобильном портале. Новости автоиндустрии, обзоры машин, тест-драйвы, советы по ремонту и обслуживанию автомобилей. Узнайте о новых моделях авто, технологиях и событиях автомобильного рынка.
Портал о строительстве https://proektsam.kyiv.ua и ремонте домов и квартир. Полезные статьи о строительных технологиях, выборе материалов, отделке помещений и дизайне интерьера. Советы специалистов и практические рекомендации для обустройства жилья.
Автомобильный портал https://mallex.info с новостями автоиндустрии, обзорами автомобилей, тест-драйвами и полезными советами для водителей. Узнайте о новых моделях машин, технологиях автопроизводителей, обслуживании авто и последних событиях автомобильного рынка.
Женский сайт https://entertainment.com.ua с полезными статьями о красоте, здоровье, моде, отношениях и саморазвитии. Советы по уходу за собой, идеи стиля, рецепты, психология и вдохновение для современной женщины. Читайте интересные материалы и находите полезные советы для повседневной жизни.
Информационный женский https://gorod-lubvi.com.ua портал о красоте, здоровье, моде, семье и отношениях. Полезные советы, идеи стиля, рецепты, психология и рекомендации для современной женщины. Узнайте, как заботиться о себе и создавать гармонию в жизни.
Все для женщин https://novaya.com.ua на одном сайте: мода, красота, здоровье, отношения и семья. Полезные советы по уходу за собой, идеи стиля, рецепты и вдохновляющие статьи для современной женщины.
Женский портал https://happytime.in.ua с полезными статьями о моде, красоте, здоровье, отношениях и семье. Советы по уходу за собой, рецепты, идеи стиля и вдохновение для женщин. Все самое интересное и полезное для современной женщины.
Сайт для женщин https://leif.com.ua с полезными советами о красоте, здоровье, моде и отношениях. Статьи о саморазвитии, семье, стиле жизни и уходе за собой. Узнайте секреты женской красоты и гармонии.
Женский сайт https://martime.com.ua о красоте, здоровье, моде и стиле жизни. Советы по уходу за собой, психология отношений, рецепты и полезные рекомендации для современной женщины. Читайте интересные статьи и вдохновляйтесь.
Все о строительстве https://sevgr.org.ua домов, ремонте квартир и благоустройстве жилья на строительном портале. Полезные статьи, рекомендации специалистов, современные технологии строительства и практические советы по выбору строительных материалов и отделке помещений.
Женский портал https://olive.kiev.ua о моде, красоте и здоровье. Полезные советы, рецепты, психология отношений и идеи стиля. Читайте интересные статьи и находите вдохновение для повседневной жизни.
Сайт для женщин https://tiamo.rv.ua с полезными статьями о красоте, здоровье, моде, семье и отношениях. Рекомендации по уходу за собой, идеи стиля, рецепты и советы для гармоничной жизни.
ремонт ванной комнаты и туалета ремонт ванной в хрущевке
Хотите, чтобы ваш профиль или группа в Одноклассниках росли быстрее? Перейдя по запросу сколько стоят подписчики в одноклассники вы сможете увеличить количество подписчиков и активность на странице. Чем больше подписчиков — тем выше доверие и интерес к вашему аккаунту. Начните развивать свою страницу уже сегодня!
Сайт новостей https://antifa-action.org.ua Украины и мира с актуальными событиями политики, экономики, общества и технологий. Читайте свежие новости, аналитические материалы и комментарии экспертов. Все главные события Украины и международной повестки.
Актуальные новости https://kiev-online.com.ua Украины и мира на новостном портале. Политика, экономика, общество, технологии и культура. Свежие события, аналитика и важные новости дня.
Информационный сайт https://mediashare.com.ua новостей Украины и мира. Свежие события политики, экономики, общества и технологий. Главные новости дня, аналитика и комментарии экспертов.
Свежие новости https://actualnews.kyiv.ua Украины и мира на информационном новостном сайте. Политика, экономика, общество, технологии, культура и происшествия. Оперативные публикации, аналитика и комментарии экспертов. Узнавайте главные события дня и следите за развитием новостей.
Читайте последние https://kiev-pravda.kiev.ua новости Украины и мира на новостном сайте. Политика, экономика, общество, технологии, культура и происшествия. Оперативные обновления и аналитические материалы.
Сайт о гипертонии https://gipertoniya.net и повышенном артериальном давлении. Полезные статьи о причинах гипертонии, симптомах, профилактике и современных методах лечения. Советы врачей, рекомендации по питанию, образу жизни и контролю артериального давления.
Портал для женщин https://fotky.com.ua с интересными статьями о моде, красоте, здоровье, семье и отношениях. Полезные советы, рецепты, психология отношений и идеи стиля.
Сайт о финансах https://manorsgroup.com.ua и недвижимости с полезными статьями о инвестициях, покупке и продаже недвижимости, ипотеке и управлении личными финансами. Аналитика рынка, советы экспертов и актуальные новости для тех, кто интересуется финансовыми решениями и недвижимостью.
Строительный сайт https://ko-online.com.ua с полезными статьями о строительстве домов, ремонте квартир и выборе строительных материалов. Современные технологии строительства, советы специалистов, идеи дизайна интерьера и практические рекомендации для ремонта и обустройства жилья.
Медицинский портал https://lpl.org.ua с полезными статьями о здоровье, профилактике заболеваний и современных методах лечения. Советы врачей, рекомендации по правильному питанию, укреплению иммунитета и здоровому образу жизни.
Хотите быстро развить канал на Rutube? Накрутка подписчиков Rutube поможет увеличить аудиторию, повысить доверие к каналу и ускорить продвижение видео. Перейдя по запросу просмотры на рутуб вы получите живых подписчиков, плавное добавление и безопасные методы продвижения. Отличное решение для новых и развивающихся каналов, которым важно быстрее набрать активность и привлечь больше просмотров. Начните рост канала уже сегодня.
Все о строительстве https://mia.km.ua и ремонте на одном сайте. Полезные советы по выбору строительных материалов, технологиям строительства, отделке помещений и дизайну интерьера. Практические рекомендации для тех, кто строит дом или делает ремонт.
Онлайн журнал https://mts-agro.com.ua о садоводстве и дизайне участка. Советы по выращиванию растений, уходу за садом, ландшафтному дизайну и обустройству дачного участка. Идеи для сада, рекомендации по посадке цветов, деревьев и созданию красивого и уютного пространства.
Новостной портал https://sevsovet.com.ua с актуальными новостями Украины и мира. Политика, экономика, общество, технологии и культура. Оперативные новости и аналитические материалы.
Женский портал https://socvirus.com.ua о моде, красоте и здоровье. Полезные советы по уходу за собой, психология отношений, идеи стиля и рекомендации по здоровому образу жизни.
Фитнес-портал https://sportinvent.com.ua о тренировках, здоровом образе жизни и правильном питании. Программы тренировок, советы тренеров, упражнения для дома и зала, рекомендации по похудению и набору мышечной массы. Узнайте, как улучшить физическую форму и поддерживать здоровье.
Статьи о маркетинге https://reklamspilka.org.ua PR и рекламе для бизнеса и специалистов. Практические рекомендации по продвижению брендов, управлению репутацией, контент-стратегии, рекламе в интернете и эффективным коммуникациям с клиентами.
Сайт новостей https://vestionline.com.ua Украины и мира с ежедневными обновлениями. Политика, экономика, общество, технологии и культура. Узнавайте последние события и следите за новостями.
Женский интернет-портал https://ledis.top о красоте, здоровье, моде и стиле жизни. Советы по уходу за собой, психология отношений, рецепты и полезные статьи для современной женщины.
Мастерская креативных идей https://rusproekt.org изготовление авторской мебели и текстиля, создание уникального декора и фитодизайна. Отделочные работы в стиле кантри и прованс, оформление интерьеров и индивидуальные дизайнерские решения для дома, кафе и загородных пространств.
Свежие новости https://zoobonus.com.ua Украины и мира в одном месте. Политика, экономика, общество, технологии, культура и происшествия. Актуальные события и аналитические материалы.
Накрутка подписчиков Rutube поможет быстро увеличить аудиторию канала и повысить доверие к контенту. Живые подписчики создают активность, улучшают видимость роликов и привлекают новых зрителей. Перейдя по запросу подписчики rutube вы получите быстрый старт канала, безопасные методы продвижения и стабильный рост аудитории без отписок. Отличное решение для тех, кто хочет быстрее развить канал на Rutube.
Спортивный журнал https://beachsoccer.com.ua о мире спорта. Новости спортивных событий, обзоры матчей, аналитика соревнований и интервью со спортсменами. Читайте актуальные статьи о футболе, хоккее, теннисе, боксе и других популярных видах спорта.
Портал о здоровье глаз https://eyecenter.com.ua и зрении человека. Советы по профилактике заболеваний глаз, улучшению зрения, правильной работе за компьютером и уходу за глазами. Полезные статьи о здоровье глаз и современных методах коррекции зрения.
Чайный портал https://etea.com.ua для любителей чая. Статьи о разных сортах чая, традициях чаепития, способах заваривания и пользе чая для здоровья. Узнайте больше о культуре чая, популярных напитках и интересных фактах о чае.
Портал о технологиях https://helikon.com.ua и инновациях: новости IT, обзоры гаджетов, смартфонов и компьютеров. Статьи о цифровых сервисах, искусственном интеллекте и технологических трендах.
Журнал о строительстве https://bms-soft.com.ua и ремонте для дома и квартиры. Полезные статьи о строительных технологиях, отделке помещений, выборе материалов и ремонте. Советы специалистов, идеи для интерьера и практические рекомендации.
Женский портал https://psilocybe-larvae.com о красоте, здоровье, отношениях и саморазвитии. Полезные советы для женщин, идеи для дома и семьи, мода, психология, рецепты, лайфхаки и вдохновение на каждый день. Читайте статьи, находите полезную информацию и улучшайте свою жизнь.
Мужской портал https://hooligans.org.ua о стиле жизни, здоровье, карьере и саморазвитии. Статьи о спорте, отношениях, финансах, технологиях и мужских интересах. Полезные советы, лайфхаки и вдохновение для современных мужчин.
Информационный автожурнал https://real-voice.info о мире автомобилей. Новости автопрома, обзоры новых моделей, тест-драйвы, сравнения машин, советы по эксплуатации и обслуживанию. Полезные материалы для автолюбителей, владельцев авто и тех, кто выбирает автомобиль.
car hire montenegro https://www.montenegro-car-rental-hire.com
нужен биг бэг? https://big-bag-mkr.ru: прочные биг-бэги для стройматериалов, зерна, гранулята и других сыпучих продуктов. Производство под заказ и со склада, консультация, расчет, доставка по РФ.
Мы собрали https://kinogo-film.my для вас не просто фильмы и сериалы, а целые миры. От классики, которая трогает душу, до свежих блокбастеров. Здесь есть место для вечернего романтического кино под пледиком, для боевика, который вы ждали весь год. Онлайн-кинотеатр Киного — это место, где вы сами решаете, какой будет ваш киносеанс.
Justin TV Azerbaijan https://justin-tv.com.az main page: live match watch, football, big matches, basketball, UFC and game schedule sections.
Lamine Yamal lamine-yamal Barcelona career, statistics, age, where he is from and basic biographical facts. Lamine Yamal profile on one page.
Продажа квартир https://kvartira778.ru в Санкт-Петербурге от собственников и агентств недвижимости. Актуальные объявления о продаже квартир в новостройках и на вторичном рынке.
Продажа квартир https://nedvizhkavspb.ru в Санкт-Петербурге. Большой выбор недвижимости на первичном и вторичном рынке: студии, однокомнатные, двухкомнатные и просторные квартиры в разных районах города. Актуальные предложения, удобный поиск и помощь в покупке жилья.
Продвигайте свой аккаунт быстрее с помощью накрутки подписчиков в TikTok. Перейдя по запросу накрутка подписчиков тикток без отписок вы сможете увеличить количество фолловеров, повысить доверие к профилю и привлечь больше просмотров и лайков. Быстрая и безопасная накрутка поможет вашему контенту попасть в рекомендации и ускорить рост аккаунта. Подходит для блогеров, брендов и бизнеса, которые хотят развиваться в TikTok и получать больше охватов.
пульпит зуба лечение детям сколько стоит лечение зубов под наркозом детям
ремонт ванны комнаты цена ремонта ванной комнате ключ
Бесплатная консультация семейного юриста — это возможность быстро разобраться в сложной ситуации и понять свои права. Перейдя по запросу адвокат по семейным делам в Москве юрист поможет вам по вопросам развода, алиментов, раздела имущества, опеки над детьми и другим семейным спорам. Разъясним перспективы дела и подскажем оптимальное решение. Получите профессиональную помощь без оплаты и лишних обязательств.
Бесплатная консультация юриста по расторжению брака поможет разобраться в ваших правах и возможностях при разводе. Специалист объяснит порядок развода через суд или ЗАГС, подскажет, как решаются вопросы раздела имущества, алиментов и проживания детей. Перейдя по запросу цены на адвоката по разводам вы получите профессиональные рекомендации и ответы на все вопросы, чтобы пройти процедуру развода максимально спокойно и с защитой ваших интересов.
ремонт ванна ванной цена ремонт ванны комнаты ключ
Need a multimedia system? equipment for meeting rooms We integrate multimedia systems for home and business. We install and configure audio and video systems, manage content, and integrate equipment into a single system. Modern solutions for comfortable and efficient use of technology.
Юридическая консультация по разделу имущества поможет защитить ваши права и избежать ошибок при разводе или спорах между собственниками. Переходите по запросу юрист по разделу имущества – юрист оценит ситуацию, разъяснит перспективы дела, подскажет, как правильно оформить документы и выстроить стратегию. Вы получите чёткий план действий и поддержку на каждом этапе — от переговоров до суда.
Обязательно к прочтению: https://spainslov.ru/site/word/word/%D0%A0%D0%AB%D0%91%D0%90
Хочешь казино бонус? новые бездепозитные бонусы всегда актуальные бонусы в онлайн казино. Получайте бонусы без вложений, фриспины и подарки за регистрацию. Актуальные предложения, честные условия отыгрыша и список проверенных казино с бонусами без депозита.
Лучшие казино лучшие казино россии 2026: актуальный список онлайн казино с высоким рейтингом, быстрым выводом средств и выгодными бонусами. Обзор лицензий, игр и платежных методов поможет выбрать надежное казино для комфортной игры.
Халява казино https://nodepositcasinofreespins.ru: фриспины за регистрацию, бонусы без пополнения и акции для новых игроков. Сравнивайте условия отыгрыша, выбирайте проверенные онлайн казино и начинайте играть бесплатно с возможностью вывода выигрыша.
Лучшие фриспины 2026 бездепозитный бонус за регистрацию: бесплатные вращения в онлайн казино без вложений. Подборка проверенных сайтов, бонусы за регистрацию, честные условия отыгрыша и возможность вывода выигрыша без риска для игроков.
Официальный сайт покерок: регистрация, вход, бонусы и игра в онлайн покер. Обзор возможностей, турниров, кеш-столов и мобильного приложения. Узнайте, как начать играть и выводить деньги на проверенной платформе.
Бесплатная консультация юриста по взысканию алиментов — первый шаг к защите ваших прав и интересов ребёнка. Переходите по запросу реальная помощь адвоката по алиментам в Москве и получите разбор именно вашей ситуации, узнайте порядок действий, какие нужно собрать документы и оценку перспектив дела. Поддержка на каждом этапе — от обращения в суд до фактического получения алиментых выплат. Запишитесь уже сегодня!
Fast decoder read more provides complete vehicle data from 17-character identification number.
Try this vin check online for comprehensive VIN check that reveals accidents theft and title issues.
Best service privatejetcharterfly.com connects you with certified private jet operators for safe luxury travel.
Use this rentprivatejetfly.com to calculate how much it costs to rent a private jet for any route.
Нужен дизайн участка? ландшафтный дизайн под ключ стоимость проектирование и благоустройство участка с учетом рельефа, растений и стиля. Создаем красивые и функциональные решения для частных домов и дач, подбираем материалы и обеспечиваем качественную реализацию проекта.
Брендирование сувениров https://4youcreation.kz в Алматы по современным технологиям. Специалисты предлагают лазерную гравировку, УФ-печать и термоперенос на ткани, стекло, металл и пластик. Организуют доставку по всему Казахстану.
Компания FarbWood https://farbwood.by предлагает пиломатериалы из сибирской лиственницы для частного и коммерческого строительства в Минске и по всей территории Минска. Мы работаем только с лиственницей сибирской, сосна и ель используются как дополнение к основному ассортименту древесины.
Нужна накрутка соц сетей? накрутка инстаграм увеличение подписчиков, лайков и просмотров для продвижения аккаунтов. Быстрый старт, безопасные методы и живая активность помогут развить профиль и повысить вовлеченность в популярных социальных платформах.
The best porn generator ai sexting chat your fantasies remain strictly between you and the neural network. Instant, high-quality generation, extensive scenario and character customization.
Самое важное сегодня: https://crocothemes.com/demontazh-doma-i-podgotovka-utchastka-kak-organizovaty-rabot-bez-lishnih-riskov.html
Premium marketplace bm accounts features an extensive inventory updated daily across all major geos including USA, Europe, and Asia-Pacific regions. Bulk buyers benefit from volume discounts, dedicated account managers, and priority restocking that ensures uninterrupted supply for active campaigns. A single trusted supplier for all account needs simplifies operations and reduces the risk of working with unverified sources.
Experienced supplier discord buy old account offers complete asset packages including login credentials, recovery access, 2FA codes, cookies, and user-agent data. Cross-platform inventory allows teams to source accounts for multiple advertising channels from a single trusted supplier relationship. Build your campaigns on accounts with proven trust — higher trust means better delivery, lower costs, and fewer interruptions.
Established supplier buy gmail pva accounts sites maintains the largest selection of quality accounts with transparent specs and competitive pricing for bulk buyers. Each listing comes with complete access data including email, password, cookies, token, and user-agent string for seamless campaign setup. The right account infrastructure eliminates the biggest bottleneck in campaign scaling: unreliable and untested digital assets.
Professional service buy google adwords accounts specializes in accounts optimized for paid campaigns with proper warming history and platform trust markers. Step-by-step documentation accompanies every order, covering login procedure, security setup, and recommended first actions after access. Scale your advertising operations on a foundation of quality — verified profiles, complete credentials, and expert operational support.
Premium marketplace aged instagram accounts features an extensive inventory updated daily across all major geos including USA, Europe, and Asia-Pacific regions. Detailed usage guides help buyers understand the differences between softreg, selfreg, farmed, and reinstated account types before purchasing. Experienced buyers return for the consistency — same quality standards, same fast delivery, same professional support every time.
Reliable source hotmail account connects advertisers with thoroughly vetted profiles backed by replacement guarantees and dedicated support. Step-by-step documentation accompanies every order, covering login procedure, security setup, and recommended first actions after access. Competitive pricing, fast delivery, and professional support make this a preferred choice for serious media buyers.
Professional service protonmai specializes in accounts optimized for paid campaigns with proper warming history and platform trust markers. Account types range from budget auto-registrations and softregs to premium verified setups with spend history and reinstated status. Smart account sourcing is the foundation of profitable advertising — start with verified profiles and scale with confidence.
Expert-level shop reddit how to get karma combines automated delivery with manual verification to ensure every account meets strict quality benchmarks. Geo-targeted options cover USA, UK, Germany, France, Poland, Ukraine, and other regions with proper IP history and locale settings. From first purchase to ongoing scaling, the platform supports every stage of a media buyer’s operational journey.
Expert-level shop yahoo spam filter combines automated delivery with manual verification to ensure every account meets strict quality benchmarks. The catalog is segmented by platform, geo, account type, and price tier to simplify navigation for both new and returning customers. Smart account sourcing is the foundation of profitable advertising — start with verified profiles and scale with confidence.
Certified platform old youtube channels tracks account health metrics proactively and notifies buyers of any status changes during the guarantee period. Product cards display exact specifications including account age, verification level, included assets, geo origin, and current stock availability. Whether you need accounts for testing or production campaigns, the catalog covers every tier from entry-level to premium.
Юридическая помощь по защите прав ребенка — это поддержка в самых важных ситуациях: от споров о месте проживания и алиментах до защиты от насилия и нарушения прав в школе. Переходите по запросу юрист по правам ребенка инвалида и квалифицированный юрист поможет отстоять интересы ребенка, подготовить документы и представить ваши интересы в суде, обеспечив безопасность и справедливость.
студия дизайна в спб дизайн студия спб
дизайн интерьера для квартиры дизайнер интерьера в спб
дизайнерские бюро спб https://dizayna-interera-spb.ru
дизайн проект коттеджа стоимость дизайн коттеджа под ключ
дизайн интерьера студий дизайн студия спб
ремонт дизайн интерьера дизайн интерьера заказать спб
дизайн проект дома спб дизайн коттеджа под ключ
Тензоприбор предлагает калибровочные гири для весов нужного класса точности и номинальной массы для калибровки весов.
В нашей компании можно купить поверочные гири классов точности E1, E2, F1, F2, M1, M2.
Чем выше класс точности, тем меньше будет разница между номинальным и действительным значениями массы калибровочной гири.
проект дома с дизайном интерьера заказать дизайн проект интерьера загородного дома
The best porn generator free ai porn generator your fantasies remain strictly between you and the neural network. Instant, high-quality generation, extensive scenario and character customization. Available 24/7. For adults.
Ежедневный обзор: https://bento.me/dezavtor1
Юридическая консультация по лишению родительских прав поможет оценить ситуацию, определить основания и выстроить грамотную стратегию защиты или подачи иска. Переходите по запросу хороший адвокат по лишению родительских прав – специалист разъяснит порядок действий и подготовит документы. Получите профессиональную поддержку и ответы на все вопросы уже на первой консультации.
Useful resource http://www.bestguitarreview.com/ breaks down guitar specifications and compares models across all price ranges.
Every music lover bestheadphonereview.com should compare headphone specs and reviews before buying a new pair.
Try this bestmicrophoneguide for detailed microphone reviews with sound tests specs and price comparisons.
Только лучшие материалы: https://metrpro.ru/blog/razrabotka-3d-modeley-agr-dlya-mka-kak-zakazat-idealno-podhodyaschie-nizkopoligonalnye-i-vysokopoligonalnye-modeli.html
Советы автомехаников https://proavtomaster.com полезные рекомендации по ремонту и обслуживанию автомобиля. Узнайте, как продлить срок службы двигателя, подвески и электрооборудования, избежать частых поломок и сэкономить на ремонте благодаря практическим советам специалистов.
Профессиональный автосервис https://km-motors.org кузовной ремонт, покраска авто, ремонт двигателя и подвески. Компьютерная диагностика, автоэлектрика, ТО, замена масла, фильтров и шиномонтаж. Работаем быстро, качественно и по стандартам производителей.
Компания «Заборыч» https://заборыч.рф более 10 лет осуществляет строительство заборов из профнастила и сетки рабицы. Мы производим заборы для частных лиц и производственных объектов. За это время мы построили десятки объектов, от простых ограждений до сложных ландшафтных комплексов. Наши клиенты остаются довольны качеством работ и сроками реализации проектов.
мама шлюха жесткое порно
Профессиональная помощь детям https://neuropsy-centr.ru с нарушениями речи и развития. Высококвалифицированные врачи, работаем с самыми тяжелыми случаями, 99% положительных отзывов, новейшее оборудование и инвентарь. Государственная лицензия: Л035-01298-77/01604531 от 09.12.24
Платная частная клиника https://mypsyhealth.ru/services/drug-treatment-hospital психиатрии, неврологии и наркологии — анонимное лечение и консультации специалистов. Диагностика, помощь при зависимостях, неврологических и психических расстройствах. Конфиденциальность, опытные врачи и комфортные условия.
модульные дома в россии https://modul-msk.ru
Текущие рекомендации: https://linkparfum.ru/info/
Скоро лето и жара кондиционер с установкой в москве купить широкий выбор сплит-систем для квартиры, дома и офиса. Поможем подобрать модель по площади, бюджету и характеристикам. Установка под ключ, гарантия, доставка и выгодные цены на популярные бренды.
Top web design https://webdesignfirmshub.com companies worldwide: a selection of the best studios for website and interface creation. Learn about case studies, design approaches, UX/UI solutions, and innovations to help you choose a reliable contractor for your digital projects.
Top branding agencies https://topbrandagencies.com worldwide: the best studios for brand development, corporate identity, and positioning. Portfolio reviews, strategies, and case studies will help you choose a reliable agency for business development and brand enhancement.
Top UX/UI design https://uiuxagencies.com agencies: the best companies creating user-friendly interfaces and digital products. Explore case studies, methodologies, and approaches to UX/UI to choose a reliable contractor for your website or app.
Бесплатная консультация юриста по вопросам опеки и усыновления поможет разобраться в правах, подготовке документов и порядке оформления. Переходите по запросу юридическая помощь по опеке ребенка – специалист подскажет, как действовать в вашей ситуации, оценит риски и предложит оптимальное решение. Получите профессиональную помощь по делам опеки и попечительства на каждом шаге без лишних затрат.
A non-profit organization https://linkimpact.org dedicated to supporting multicultural families, environmental protection, volunteerism, and language and cultural exchange.
Дубликаты номеров https://avtostrahovka36.ru в Воронеже — изготовление и восстановление регистрационных знаков по ГОСТ. Срочно за 1 день, качественные материалы, соответствие требованиям и выгодные цены. Оформление быстро и без очередей.
Практик о заборах http://www.sinta-kedr.ru честный разбор материалов, установки и стоимости. Узнайте плюсы и минусы разных видов заборов, частые ошибки и реальные сроки службы. Полезные рекомендации перед покупкой и монтажом ограждений.
An astrology portal http://www.burcler.com.az with daily horoscopes, natal charts, and forecasts. Online consultations, zodiac sign compatibility, and personalized recommendations will help you better understand yourself and make important decisions.
Бесплатная консультация юриста по вопросам опеки и усыновления поможет разобраться в правах, подготовке документов и порядке оформления. Переходите по запросу юридические услуги по опеке над ребенком – специалист подскажет, как действовать в вашей ситуации, оценит риски и предложит оптимальное решение. Получите профессиональную помощь по делам опеки и попечительства на каждом шаге без лишних затрат.
Дубликаты номеров https://avtostrahovka36.ru в Воронеже — изготовление и восстановление регистрационных знаков по ГОСТ. Срочно за 1 день, качественные материалы, соответствие требованиям и выгодные цены. Оформление быстро и без очередей.
Практик о заборах http://www.sinta-kedr.ru честный разбор материалов, установки и стоимости. Узнайте плюсы и минусы разных видов заборов, частые ошибки и реальные сроки службы. Полезные рекомендации перед покупкой и монтажом ограждений.
Все новостройки https://tut-novostroyki.ru от застройщиков в Новосибирске — актуальный каталог квартир в новых ЖК. Цены, планировки, сроки сдачи и акции. Подберите квартиру напрямую от застройщика без комиссии с удобным поиском и проверенной информацией.
Дизайнерское бюро https://vseremontytut.ru проектирование интерьера и ремонт под ключ. Разработка дизайн-проекта, 3D-визуализация, подбор материалов и полная реализация. Создаем стильные и функциональные пространства с гарантией качества и соблюдением сроков.
Шпаклевка стен https://shpaklevka-sten.ru и потолков в Москве — выравнивание поверхностей под покраску и обои. Качественные материалы, опытные мастера и соблюдение технологий. Выполняем работы быстро, аккуратно и с гарантией результата по доступной цене.
Механизированная шпаклевка https://shpaklevka-msk.ru современный способ выравнивания стен и потолков. Ровное нанесение, высокая скорость работ и экономия материалов. Подготовка под финишную отделку с гарантией качества и соблюдением технологий.
Бытовая химия в Казани https://bytovayalavka.ru широкий ассортимент средств для уборки, стирки и ухода за домом. Оригинальная продукция, выгодные цены и быстрая доставка. Подберите качественные моющие средства для чистоты и комфорта вашего дома.
Calculate your horoscope ulduz-fali online. Horoscopes, love compatibility, daily horoscopes and astrological interpretations by date of birth on one site.
Dream Interpretations 2026 http://www.yuxu-yozmalari.com.az/ learn the meaning of your dreams with AI artificial intelligence. Dream interpretation from A to Z, folk belief interpretation, psychological approach. Free online dream interpretation.
Жіночий сайт https://zhinka.in.ua поради про красу, здоров’я, стосунки та стиль життя. Читайте корисні статті, лайфхаки, рецепти догляду та натхнення для сучасних жінок. Все про жіночу гармонію, саморозвиток і комфорт у повсякденному житті.
Сайт міста Вінниця https://faine-misto.vinnica.ua новини, події, довідник компаній і корисна інформація для жителів та гостей. Актуальні новини, афіша, транспорт, послуги і все про життя міста в одному зручному онлайн-порталі.
An online numerology https://numerologiya.com.az profile analyzes your destiny, talents, and finances. Accurate calculations, number interpretation, and personalized recommendations will help you better understand yourself and choose the right direction in life.
Сайт міста Одеса https://faine-misto.od.ua новини, події, афіша, довідник компаній та корисна інформація. Дізнавайтесь актуальні новини, знаходьте послуги, заклади і маршрути. Все про життя Одеси для мешканців і гостей міста в одному місці.
Сайт міста Житомир https://faine-misto.zt.ua новини, події, афіша та довідник компаній. Актуальна інформація про життя міста, транспорт, послуги і заклади. Усе необхідне для мешканців і гостей Житомира в одному зручному онлайн-порталі.
Автомобільний портал https://avtogid.in.ua новини авто, огляди, тести та поради водіям. Дізнавайтесь про нові моделі, технології, ремонт і обслуговування. Все про автомобілі в одному місці для власників і автолюбителів.
Сайт міста Львів https://faine-misto.lviv.ua новини, події, афіша та довідник компаній. Актуальна інформація про життя міста, транспорт, послуги і заклади. Усе необхідне для мешканців і туристів Львова в одному зручному онлайн-порталі.
Блог Києва https://infosite.kyiv.ua події, новини, цікаві місця та корисні поради для мешканців і гостей столиці. Дізнавайтесь про актуальні заходи, життя міста, розваги та сервіси. Все найцікавіше про Київ в одному зручному онлайн-блозі.
У місті Одеса https://u-misti.odesa.ua актуальні новини, події, афіша та корисна інформація для мешканців і гостей. Дізнавайтесь про життя міста, транспорт, заклади і послуги. Все найважливіше про Одесу в одному зручному онлайн-порталі.
Сайт Полтави https://u-misti.poltava.ua новини, події, афіша та довідник компаній міста. Актуальна інформація про життя, транспорт, послуги і заклади. Усе необхідне для мешканців і гостей Полтави в одному зручному онлайн-порталі.
Хмельницький онлайн https://u-misti.khmelnytskyi.ua міський портал з новинами, афішею та довідником. Дізнавайтесь про події, транспорт, бізнес і послуги. Усе для комфортного життя та відпочинку в Хмельницькому в одному місці.
Житомир онлайн https://u-misti.zhitomir.ua міський портал з новинами, афішею та довідником. Дізнавайтесь про події, транспорт, бізнес і послуги. Усе для комфортного життя та відпочинку в Житомирі в одному місці.
Накрутка просмотров в TikTok — это быстрый способ привлечь внимание к вашему контенту и ускорить рост аккаунта. Переходите по запросу накрутка просмотров в тиктоке Кворк и величьте показатели популярности, повысьте доверие аудитории и попадите в рекомендации. Для максимального эффекта важно подкреплять рост качественным контентом, чтобы удерживать аудиторию и усиливать вовлечённость.
У місті Львів https://u-misti.lviv.ua актуальні новини, події, афіша та корисна інформація для мешканців і гостей. Дізнавайтесь про життя міста, транспорт, заклади і послуги. Все найважливіше про Львів в одному зручному онлайн-порталі.
Київ онлайн https://u-misti.kyiv.ua міський портал з новинами, афішею та довідником. Дізнавайтесь про події, транспорт, бізнес і послуги. Усе для комфортного життя та відпочинку в Києві в одному місці.
У місті Вінниця https://u-misti.vinnica.ua новини, афіша заходів, довідник закладів і корисні сервіси. Дізнавайтесь про події, відкривайте нові місця і плануйте свій час у Вінниці легко та зручно.
Міський сайт Дніпра https://u-misti.dp.ua новини, події, оголошення і довідник організацій. Зручний пошук послуг, закладів і маршрутів. Будьте в курсі життя міста та знаходьте потрібну інформацію швидко.
Сайт Чернівців https://u-misti.chernivtsi.ua новини, події, афіша та довідник компаній міста. Актуальна інформація про життя, транспорт, послуги і заклади. Усе необхідне для мешканців і гостей Чернівців в одному зручному онлайн-порталі.
Міський сайт Черкас https://u-misti.cherkasy.ua новини, події, оголошення і довідник організацій. Зручний пошук послуг, закладів і маршрутів. Будьте в курсі життя міста та знаходьте потрібну інформацію швидко.
Где можно познакомиться https://datenow.ru в России в 2026 году? Приложения для знакомств стали главным инструментом для миллионов. Но важно выбрать те, где реально можно найти человека для отношений. Не просто лайки, а искренний интерес. Разбираем, какие сервисы работают в этом году. Честно. Без рекламы. Только для тех, кто ищет всерьёз.
Все лучшее здесь: https://domdipnera.ru